Good security camera placement can matter just as much as the camera you choose. An expensive camera pointed in the wrong direction may provide less useful coverage than a modest camera positioned carefully.
The goal isn’t necessarily to put cameras everywhere. It’s to identify important areas around your property and position cameras so they provide useful views while respecting privacy and avoiding unnecessary blind spots.
Start With the Main Entry Points
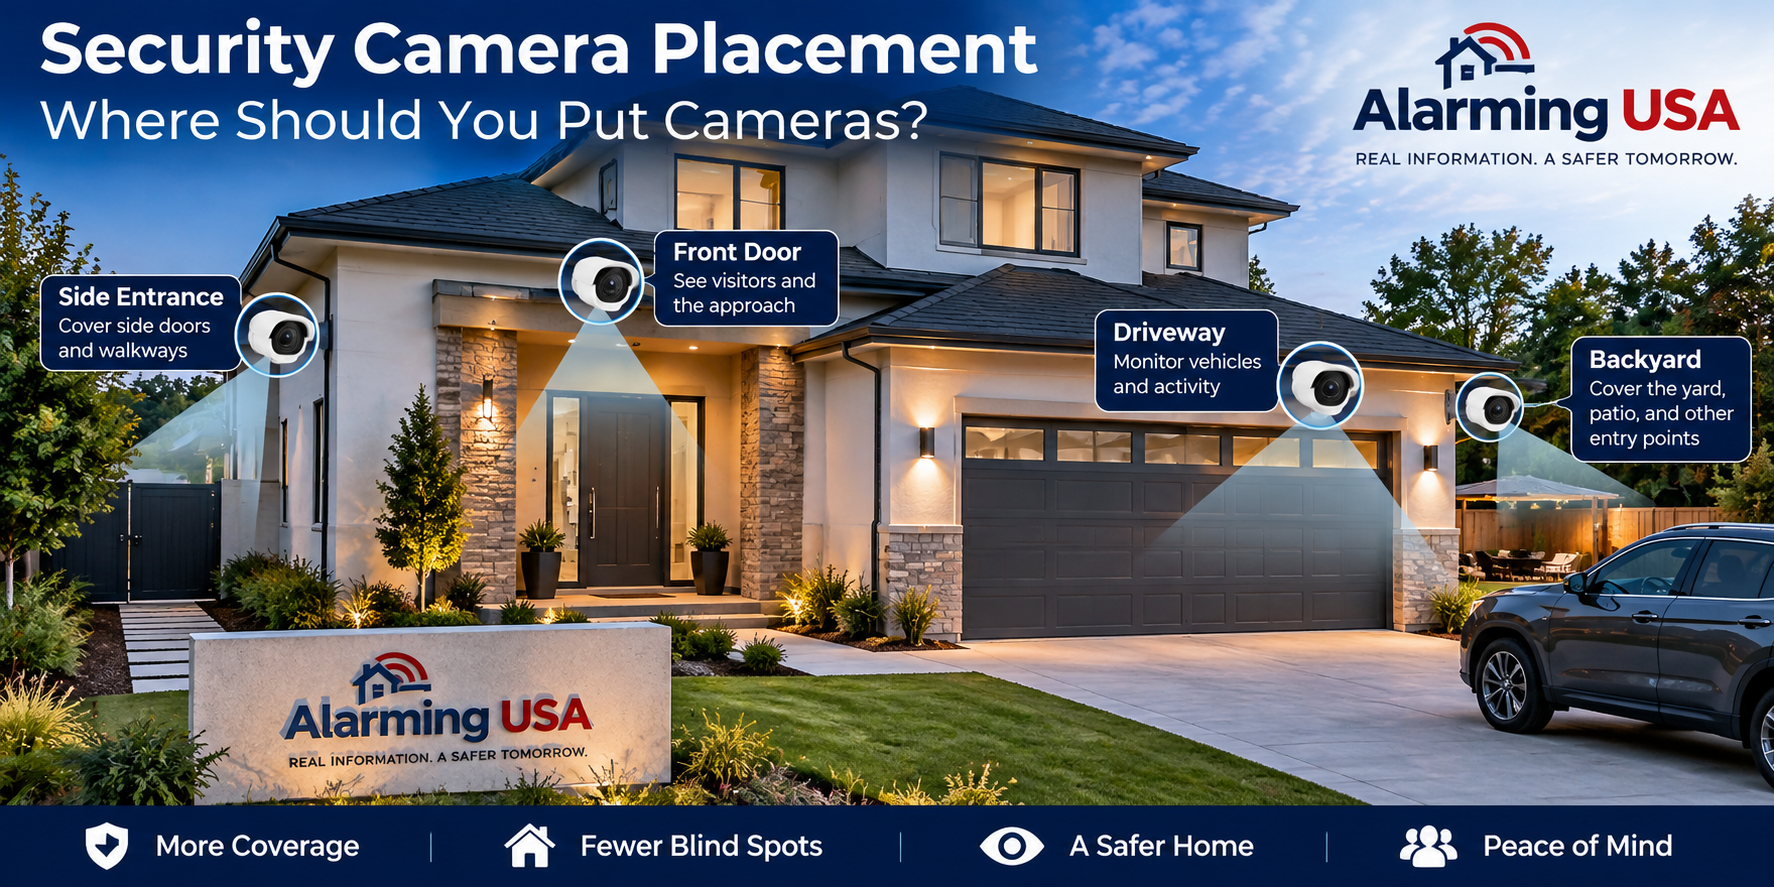
Doors are a logical place to begin when planning camera coverage.
Consider entrances that people commonly use, including:
- Front doors
- Side doors
- Back doors
- Garage entrances
- Patio or sliding doors
A camera should provide a useful view of people approaching the entrance rather than simply showing the door itself.
Think about where someone would walk before reaching the door and whether landscaping, columns, decorations, or lighting could obstruct the camera’s view.
Front Door Camera Placement
The front entrance is often one of the most important locations to consider.
A video doorbell can provide a close view of visitors, while a separate exterior camera may provide a wider view of the walkway, porch, or surrounding area.
If you use both, try to make their coverage complementary rather than having two cameras capture almost the same image.
Test the view during both daytime and nighttime conditions.
Back and Side Doors
Less visible entrances shouldn’t automatically be overlooked.
Back and side doors may be hidden from the street or neighboring properties. A camera covering these locations can provide additional visibility around the home.
Position cameras so they capture the approach to the entrance when practical.
Also consider gates or pathways that lead toward these doors.
Driveways
A driveway camera can help provide an overview of vehicles and activity approaching the property.
The ideal position depends on the shape and length of the driveway, surrounding landscaping, lighting, and where vehicles are normally parked.
Be realistic about what you expect the camera to capture. A wide overview camera and a camera intended to capture finer details may have different placement requirements.
Garages
Garages may contain vehicles, tools, bicycles, and other property, and they can also provide another entrance into the home.
Depending on the layout, you might consider coverage of:
- The garage door
- The driveway
- An exterior service door
- The door connecting the garage to the house
One properly positioned camera may cover several of these areas, while larger properties may require more than one viewpoint.
Ground-Floor Windows
You don’t necessarily need a camera pointed directly at every window.
Instead, look at which windows are accessible from the ground and whether another camera already provides coverage of the surrounding area.
A strategically positioned exterior camera may cover several windows along one side of a house.
This is another reason to plan the entire system before purchasing cameras.
Walkways and Gates
Walkways, side yards, gates, and other natural approaches to the house can be useful camera locations.
Think about how people actually move around your property.
A camera that captures an approach route may provide useful information before someone reaches a door or another important area.
Avoid creating unnecessary coverage of neighboring property when positioning cameras near property boundaries.
Camera Height
Mounting a camera extremely high can provide a broad overview, but it may reduce useful detail.
Mounting too low can make the camera easier to reach or interfere with.
The appropriate height depends on the camera, lens, viewing angle, location, and purpose.
Before permanently mounting a camera, temporarily test the intended position whenever possible. Review actual footage rather than relying only on how the location looks from the ground.
Avoid Pointing Cameras Directly Into Bright Light
Lighting has a major effect on camera images.
A camera pointed toward strong sunlight, headlights, reflective surfaces, or bright exterior lighting may have difficulty producing a balanced image.
The problem can change throughout the day as the sun moves.
Check important camera views at different times, particularly around sunrise, sunset, and nighttime.
Consider Nighttime Lighting
A location that looks excellent during the day may perform very differently after dark.
Many cameras use infrared illumination for low-light viewing. Nearby walls, roof surfaces, windows, gutters, or other reflective objects can sometimes interfere with the nighttime image.
Exterior lighting can also help, but poorly positioned lighting may create glare or extreme differences between bright and dark areas.
Test every important camera after dark.
Watch for Landscaping
Trees, bushes, vines, and other landscaping can create problems that aren’t obvious during installation.
Branches may move in the wind, vegetation may grow into the camera’s field of view, and leaves can reflect infrared illumination at night.
Landscaping can also generate frequent motion notifications.
Leave enough clearance around cameras and include vegetation checks as part of routine maintenance.
Avoid Blind Spots
After deciding where cameras will go, look at the property as a complete system.
Ask yourself:
- Can someone approach an important entrance without appearing on a camera?
- Do two cameras unnecessarily cover the same area?
- Are there important spaces between camera views?
- Does landscaping block any approach?
- Will parked vehicles obstruct the image?
A simple sketch of your home and planned camera locations can make blind spots easier to identify.
Don’t Forget Wi-Fi Coverage
Wireless cameras need reliable communication.
A location may provide the perfect camera angle but have poor Wi-Fi coverage.
Exterior walls, distance, building materials, interference, and other network conditions can affect connectivity.
Test the wireless connection at the actual mounting location before permanently installing the camera.
If reliable wireless coverage isn’t available, a wired camera or network improvement may be a better solution.
For more information about choosing the connection method, see our guide to wired vs wireless security cameras.
Think About Power
Every camera needs a dependable power source.
Wi-Fi cameras may still require an electrical connection. Battery-powered cameras require periodic charging or battery replacement, while PoE cameras can receive power and data through compatible Ethernet connections.
When planning security camera placement, make sure you can safely provide power and maintain the camera after installation.
Don’t choose a difficult-to-access location without considering how you’ll service the equipment later.
Consider Recording and Network Capacity
Adding cameras affects more than physical installation.
Multiple high-resolution cameras can increase network traffic and storage requirements.
If you’re recording continuously, determine whether your recorder, storage system, network equipment, and available capacity can support the number of cameras you plan to install.
Cloud-connected cameras may also have subscription or bandwidth considerations.
Planning these requirements before installation can prevent surprises later.
Protect Cameras From Weather
Outdoor cameras should be designed for the environment where they’re installed.
Rain, humidity, direct sunlight, heat, cold, dust, and other conditions can affect equipment.
Follow the manufacturer’s installation requirements and environmental ratings.
Even outdoor-rated cameras benefit from thoughtful placement that reduces unnecessary exposure when possible.
Privacy Matters
Camera placement should consider privacy as well as security.
Avoid positioning cameras where they unnecessarily capture areas in which people reasonably expect privacy.
Also be mindful of neighboring properties, shared spaces, sidewalks, and other areas outside your home.
Rules concerning video and audio recording vary by location, so understand the requirements that apply where you live.
The Federal Trade Commission also provides guidance on securing home security cameras and protecting access to camera footage.
Should Cameras Be Hidden or Visible?
There are arguments for both visible and discreet camera placement.
A visible camera makes the presence of surveillance obvious. A more discreet camera may be less noticeable.
Regardless of which approach you choose, don’t sacrifice the quality of the camera view simply to hide or display the equipment.
The camera’s ability to provide useful coverage should remain the priority.
Indoor Camera Placement
Indoor cameras require additional privacy considerations.
Common areas such as entryways or shared living spaces may be locations some homeowners choose to monitor.
Avoid placing cameras in private areas where occupants or guests reasonably expect privacy.
Households should also consider who can access live video and recordings, particularly when cloud-connected cameras are used.
Test Before Permanently Installing
One of the best camera-placement techniques is also one of the simplest: test first.
Temporarily position the camera near the proposed location and review:
- Daytime video
- Nighttime video
- Motion detection
- Notifications
- Wi-Fi strength
- Viewing angle
- Image detail
- Potential obstructions
A few minutes of testing can prevent having to remount the camera later.
Review Your Cameras Regularly
Camera placement isn’t necessarily a one-time task.
Landscaping grows, furniture moves, lighting changes, buildings are modified, and your security needs may evolve.
Periodically review each camera’s actual image.
Make sure lenses are clean, timestamps are correct, recording works, views remain unobstructed, and important areas are still covered.
How Many Security Cameras Do You Need?
There isn’t a universal number.
A small home may achieve useful coverage with only a few carefully positioned cameras, while a larger property may require more.
Instead of starting with a target number, identify the areas that genuinely need coverage.
Then determine the minimum number of cameras required to provide useful views of those locations.
This approach can also help control your overall home security system cost.
Final Thoughts
Effective security camera placement starts with understanding what you want each camera to accomplish.
Prioritize entrances and important approach routes, test daytime and nighttime performance, check power and network connectivity, account for landscaping, and avoid unnecessary blind spots.
Most importantly, review the actual video after installation. The best camera position is the one that consistently provides useful coverage while respecting privacy and remaining practical to maintain.
Comments are closed.