
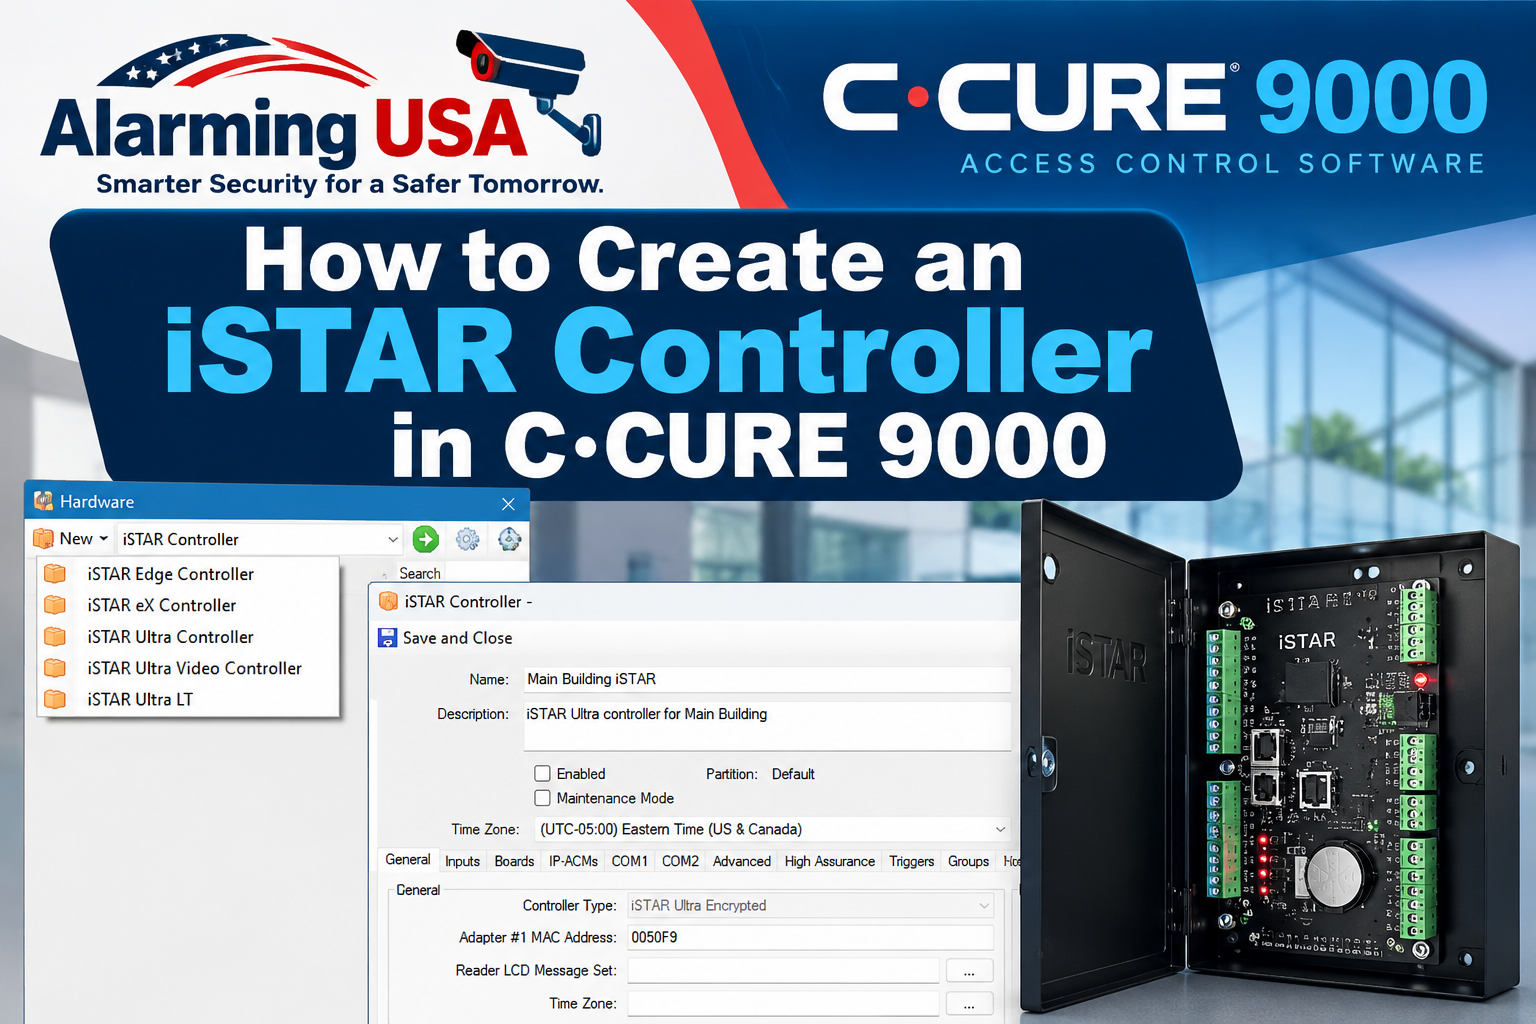
Learning how to create an iSTAR Controller in C•CURE 9000 starts with selecting the correct controller type and completing the required settings on the General tab. This guide covers the initial controller setup, including the MAC address, network configuration, time zone, cluster association, and required diagnostic password.
How to Create an iSTAR Controller in C•CURE 9000
Before creating the controller, create the iSTAR Cluster that will contain it.
1. Select the iSTAR Controller Type
From the C•CURE 9000 Hardware area, select New and choose the type of iSTAR controller being installed.
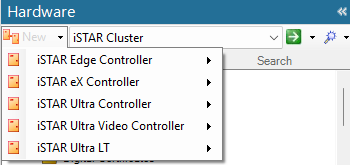
The Controller Type on the General tab is populated automatically from the controller type selected here.
2. Enter the Controller Name
Enter a clear, descriptive Name. Use the naming convention established for your C•CURE environment. Add a Description if desired.
3. Leave the Controller Disabled
Do not check Enabled yet. Leave the controller disabled during this stage of the initial configuration.
4. Configure the General Tab
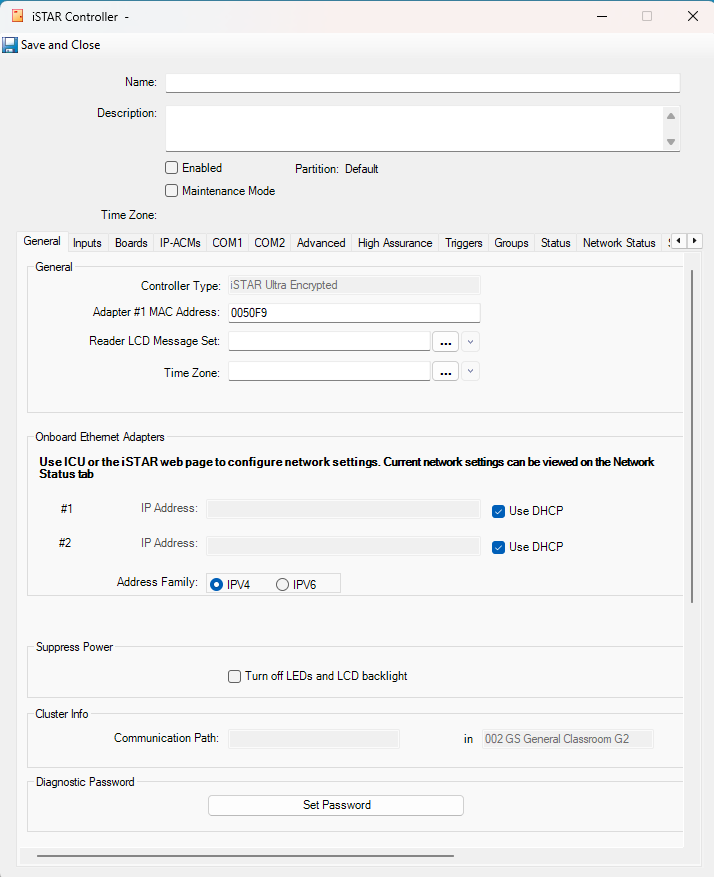
Controller Type
Verify that the automatically populated Controller Type matches the physical panel being installed.
MAC Address
Enter the physical panel’s actual MAC address in Adapter #1 MAC Address. Verify the address carefully before continuing.
5. Configure DHCP or a Static IP Address
The controller can use DHCP or a static IP address, depending on the network design. Configure the appropriate option for the installation.
ICU and the iSTAR web interface can also be used for controller network configuration. Those methods will be covered in separate guides.
6. Set the Time Zone
Set the Time Zone appropriate for the controller’s physical location.
7. Verify the Cluster Association
Review Cluster Info and verify that the controller is associated with the intended iSTAR Cluster.
8. Create the Diagnostic Password
Click Set Password in the Diagnostic Password section. A diagnostic password must be created for the controller.
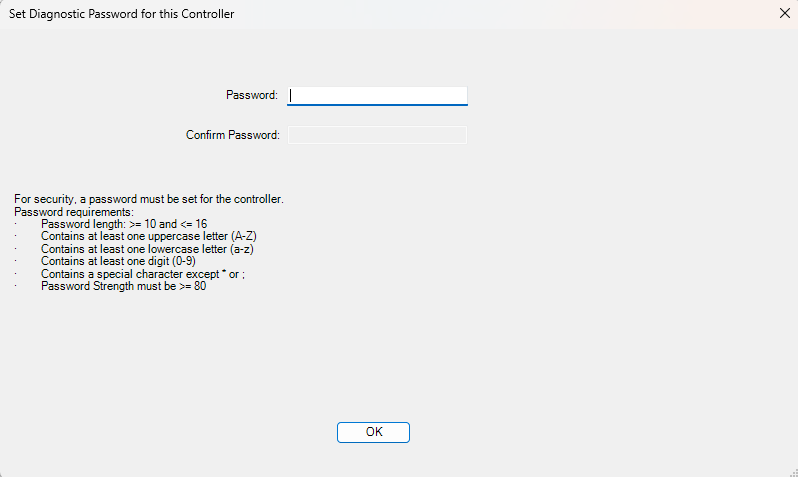
The password requirements displayed by C•CURE 9000 are:
- 10 to 16 characters long.
- At least one uppercase letter (A-Z).
- At least one lowercase letter (a-z).
- At least one digit (0-9).
- A special character except an apostrophe or semicolon.
- Password strength of at least 80.
Enter and confirm the password, then click OK. Follow your organization’s approved practices for managing controller credentials.
9. Save the Controller
Review the controller name, MAC address, network configuration, time zone, cluster association, and diagnostic password. Click Save and Close. The controller remains disabled at this stage.
What Comes Next?
The next guides in this C•CURE 9000 series will continue through the hardware needed for a controlled door, including the reader, lock relay, Door Switch Monitor (DSM), Request-to-Exit (REX) input, and iSTAR Door.
Frequently Asked Questions
Does C•CURE automatically select the controller type?
The Controller Type field is populated based on the iSTAR controller type selected when creating the controller.
Do I enable the iSTAR controller immediately?
No. In this workflow, leave Enabled unchecked during the initial controller configuration.
Can an iSTAR controller use DHCP?
Yes. Use DHCP or a static IP address according to the network design for the installation.
Is a diagnostic password required?
Yes. Create the diagnostic password using the requirements displayed by C•CURE 9000.
Note: C•CURE 9000 installations can differ based on software version, iSTAR hardware, network design, security requirements, and site standards. Follow the configuration requirements established for your environment.